The lightbox
How to photograph painted miniatures
Three things separate a snapshot from a gallery shot: soft even light, a clean backdrop and a steady camera. Here's how to get all three with kit you probably own.
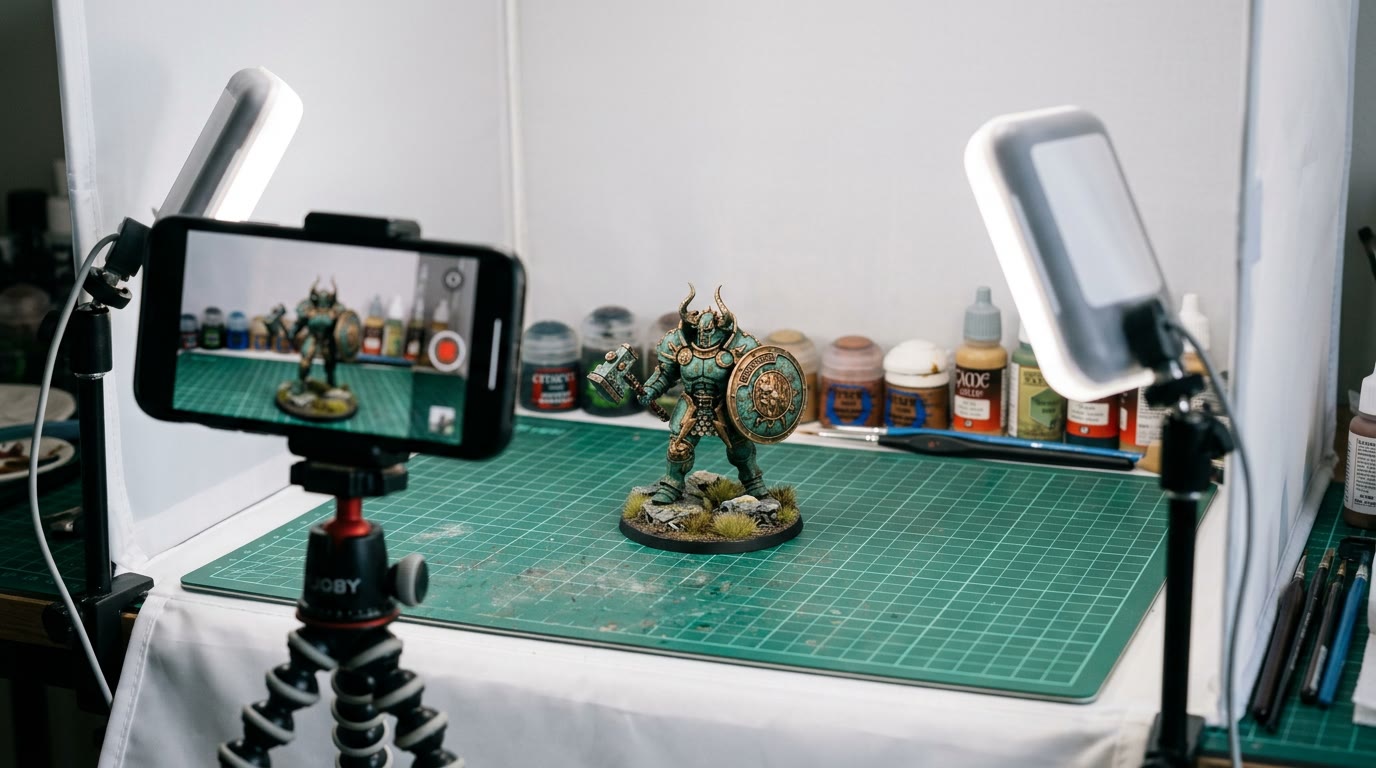
Your paint job deserves better than a blurry phone gallery. The good news: photographing miniatures well is mostly about controlling three things — light, background and camera shake — and none of them needs expensive kit. This guide takes you from desk mess to a shot you would happily hang on the wall.
Why do miniature photos come out blurry?
Because the figure is tiny. At that distance everything magnifies: your pulse, the desk, the fridge compressor two rooms away. The fix is boring and total — anchor the camera. A tripod is ideal; a stack of books with the phone leaning on a mug works nearly as well. Then fire the shot with a self-timer or a volume-button press so your finger never touches the camera at the moment of truth.
Second culprit: autofocus hunting across a 28mm figure. Tap your screen on the face or the shield boss and lock it. If your camera app has a pro mode, drop the ISO to its floor and let the shutter sit slower — you have already killed the shake, so a half-second exposure is free sharpness.
What is the best light for photographing miniatures?
Soft, even and diffuse — the same light that flatters people flatters paintwork. Harsh light punches holes in your shading and turns matte varnish into glare. You have three good options:
- A fold-up lightbox tent. The affordable ones from photography shops work exactly as advertised — the Wikipedia overview of light boxes covers why diffused white enclosures kill hard shadows.
- Two lamps and baking paper. One lamp each side, 45 degrees, sheet of baking paper clipped in front of each bulb. Costs nothing, and you can dial the warmth by moving them closer or further.
- North-facing window light. The classic painter's choice — a big soft source that never flickers. Cloudy days are your friend, not your enemy.
What you are avoiding is a single bare bulb or the ceiling light alone: one hard source equals one hard shadow, and the camera will exaggerate every brush stroke you were quietly proud of.
Which backdrop should I use?
Plain beats interesting, always. The figure is the story; the background is a wall. Sheets of coloured card, a roll of craft paper, the inside of a cereal box — any of them work. Grey card flatters most schemes; deep green or dark blue adds mood; plain white looks clinical but prints beautifully.
Curve the card from table to wall behind the figure (a "sweep") so there is no visible join line. Once you have a shot you love, the as-is print service checks your photo against every size we sell before you pay a penny.
How close should I get?
Close enough that the figure fills the frame with a little breathing room — but don't chase extreme macro. Every phone struggles below about 10cm; the lens simply is not built for it, and edges smear. If you need more detail, shoot from slightly further back and crop later. Modern phone sensors carry more pixels than a poster will ever need.
Angle matters too. Straight-on or a slight three-quarter view reads best for portraits. Top-down shots show off basing but squash the face; keep those for your progress thread on r/minipainting, not for the wall.
Do I need to edit the photo?
A little, and the edits are the same three every time: crop to the figure, lift the shadows a touch, and nudge white balance until the primer looks the colour it's in real life. Phones over-warm indoor shots, and your week of careful bone-colour blending did not survive the auto-white-balance.
Resist the saturation slider. Painted miniatures already carry strong colour; pushing it turns subtle blends into plastic. If the edit starts feeling like repainting, you have gone too far.
What about photographing a whole army or a big display board?
Step back and raise the camera to the figures' eye line. A board shot from above reads as a storage photo; the same board from a low angle, army-standard height, reads as a battle about to happen. The miniature wargaming tradition is full of dramatic dioramas precisely because the camera has been dropped to table height — do the same.
From good photo to good print
A print needs resolution, and resolution is decided when you press the shutter — you can't add it later. Shoot in your camera's highest quality setting, avoid digital zoom, and keep the file untouched by messaging apps (they compress). When you upload to our character art studio we measure your photo against each print size live and tell you honestly which sizes will print sharp; below 150 dpi we won't sell it to you at all. For the full method, from lighting rigs to paper choices, see our guide to backdrops and lighting setups.
One last habit worth stealing: take the photo the day you finish the model. Varnish glare settles, the light will never be exactly this good again, and the figure is still on the desk instead of in a display cabinet gathering dust. Shoot it, love it, then give it a proper place on the wall.
From the workbench
Questions, answered
Can I photograph miniatures with a phone?
+
Yes — a modern phone on a steady rest with soft even light produces prints up to A2. Stability and lighting matter far more than the camera badge.
Do I need a lightbox?
+
It helps, but two household lamps diffused with baking paper get you most of the way. The goal is soft, even, shadow-free light on the figure.
What resolution do I need for a print?
+
About 150 dpi at the printed size. A 12-megapixel phone photo comfortably covers A3 and usually A2. We check your file against each size before checkout.
Why does my paint look different in photos?
+
Almost always white balance. Phones warm up indoor light; nudge the temperature down until the primer matches reality.