The setups
Miniature photo backdrops and lighting setups that work
Three rigs cover every miniature photo you'll ever need: the lightbox, the paper sweep and the scene build. Each costs less than a dinner out and each has a moment it's the right tool.
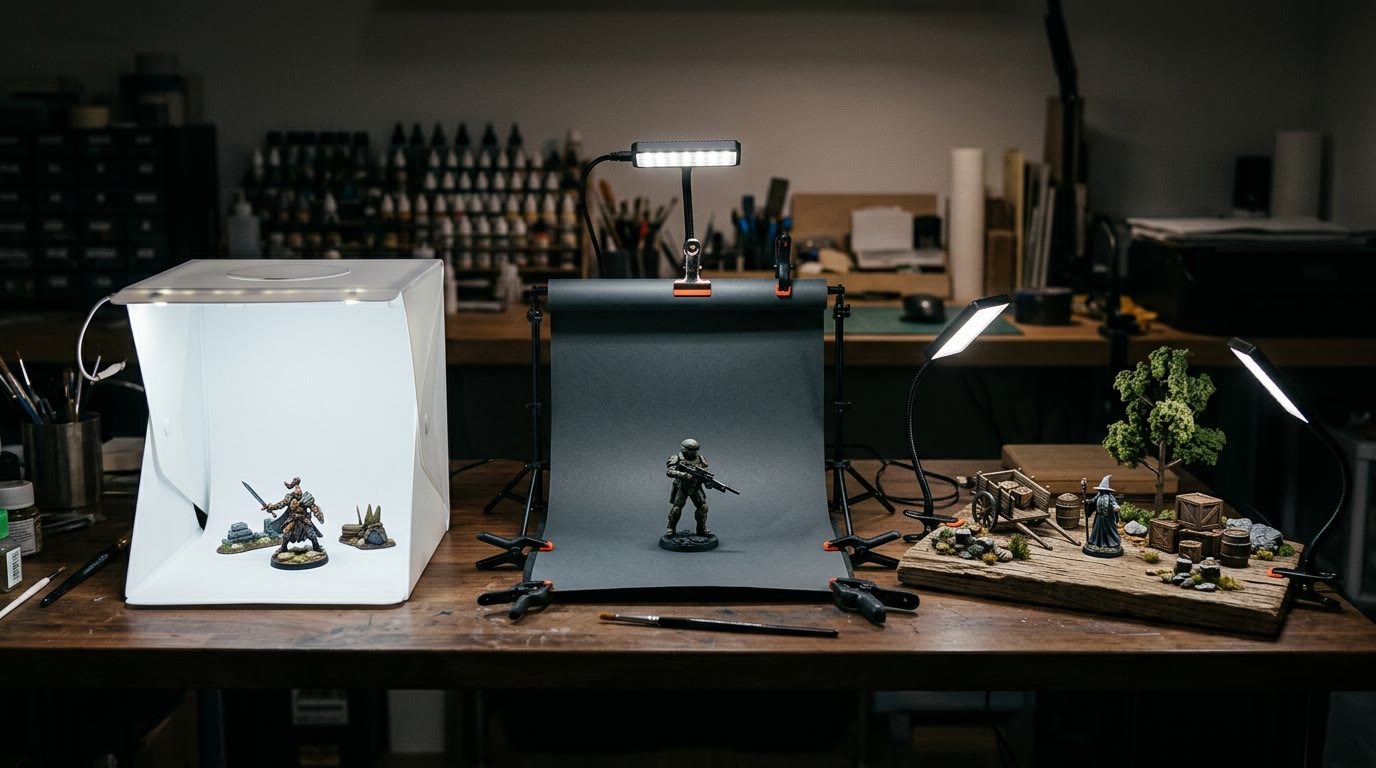
Backdrop and lighting are one decision, not two. The backdrop you choose dictates where the lights go, and the lights decide whether your shading survives the photo. Here are the three rigs worth building, what each one's for, and the mistakes each one hides.
Rig one: the lightbox tent
The fold-up white tent with two LED strips is the reliable default, and the reason it works is diffusion — light bounces off white walls until it arrives from everywhere at once, which is why the light box has been a photographer's tool for a century. Use it for: clean catalogue shots, characters you intend to print, anything where the paint job is the whole story.
Two adjustments take it from good to gallery: move the LEDs slightly forward of the tent walls (light through diffusion, not just bounced), and kill the room lights so the tent is the only source. Mixed light is the number one reason white primer comes out orange.
Rig two: the paper sweep
A sheet or roll of card curving from table to wall — grey, deep green or navy — with one key lamp and one fill. This is the portrait rig. The colour does emotional work: grey is neutral, green reads forest and rust, navy reads night. The sweep costs pennies and replaces the "I will fix the background later" hole-punch of doom.
Position the key lamp 45 degrees up and to one side, the fill (or a bounce card) opposite and lower. If the shadow side goes muddy, your fill is too weak; if the whole shot flattens, the fill is too strong. One stop of difference between them is the target. This rig is where most of our core photo guide advice happens.
Rig three: the scene build
Foam rock, a dead branch, sand on a board — a miniature-scale slice of world, lit like a tiny film set. It's the most fun and the easiest to overdo. Two rules keep it honest: the props sit behind and beside the figure, never crowding it, and one dominant light direction throughout, as if the sun has made up its mind.
The scene build is also how you photograph squads and dioramas — the tabletop classics all trace back to someone pointing a camera at a lovingly built board at figure-eye level.
Which backdrop colour prints best?
Mid-grey and deep green print beautifully on both light and dark walls, which matters if the destination is a frame. Pure white can blow out next to a bright page; pure black can crush into the dark. If the print is the goal, shoot both a grey and a green version and pick after you see the free preview — the studio shows you the enhanced result before you pay.
The five-minute checklist
- Camera anchored, self-timer on, ISO at its floor.
- One light direction; every other source is fill or off.
- Backdrop curved, clean and a hand-span behind the figure.
- White balance set against the primer, not the room.
- Shoot highest quality, no digital zoom, file untouched by chat apps.
When a shot earns its frame, send it straight to the print service — it will tell you honestly which sizes your file can carry, and the price includes UK delivery.
From the workbench
Questions, answered
Is a lightbox tent worth it for miniature photos?
+
Yes — it's the fastest route to clean, shadow-free catalogue shots and the easiest rig to get consistent results from. Two LEDs and diffusion do most of the work.
What colour backdrop should I use?
+
Mid-grey is the safe all-rounder, deep green adds mood and prints well, white looks clinical. For prints, grey or green survive both light and dark walls best.
How many lights do I need?
+
One key lamp and one fill (a bounce card counts). More sources mean more shadows to fight, not fewer.
Why is my white primer orange in photos?
+
Mixed lighting — the tent LED plus a warm room bulb. Kill the room lights and set white balance against the primer itself.