8 September 2026
The hobby room, made deliberate.
Every miniature painter's room reaches the same point: the desk is covered in pots and brushes, the shelf is full of half-painted models, and the walls are bare. The hobby has taken over the space. Here is how to make it look like you meant it.
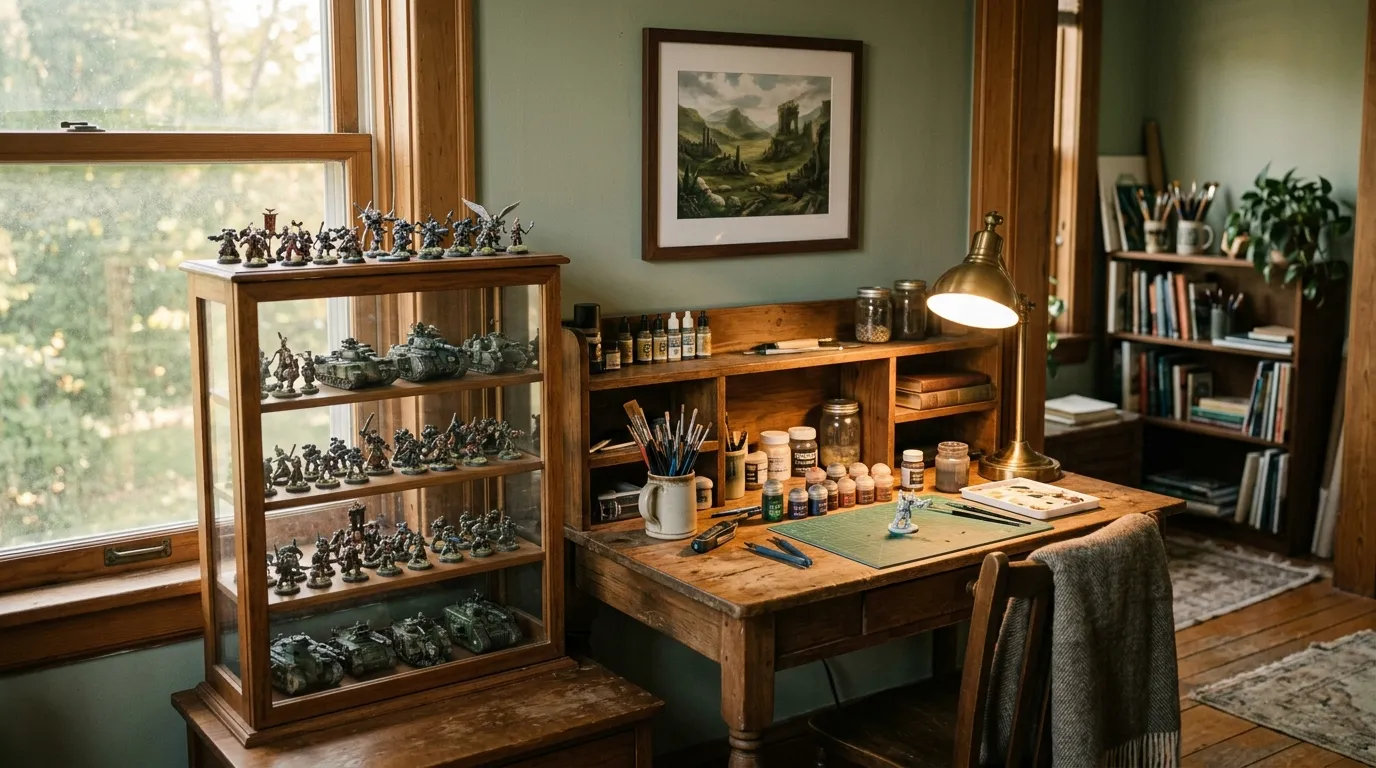
Every miniature painter's room reaches the same point. The desk is covered in paint pots and brushes. The shelf is full of half-painted models and empty sprues. The walls are bare because the good stuff is sitting in a display case nobody can see into properly, or worse, in a box under the bed. The hobby has taken over the space, and the space looks like it.
This page is about making that look deliberate. Not a magazine shoot — a working hobby room that also happens to look like the person who uses it cares about what they make.
What goes on the walls
The walls are the part most hobby rooms get wrong, because the obvious thing — shelves of miniatures — is also the hardest to do well. A shelf of models at eye level looks like a shop display. At the wrong height it looks like clutter.
Wall art solves the problem differently. A print of a painted miniature — enlarged, restyled, framed — gives the wall a focal point without needing a shelf, a light source or a dust cover. It shows the miniature at a scale the eye can read from across the room, which no shelf display can do. And because the print is made from your own photograph, it is a record of a model you actually painted, not a stock image of somebody else's.
We make exactly this: upload a photo of your painted miniature and we restyle it as an oil painting, watercolour or line art, printed and framed. The process guide covers how it works. The display guide covers the shelf approach if you would rather show the originals.
The practical version: one or two large prints on the wall above the desk, at eye level when seated, in frames that match the room's wood or metal. Not a gallery wall of six small prints — that reads as busy. One or two, big enough to see the brushwork.
Display cases and cabinets
The display case is where the originals live. The two things that matter are glass (not acrylic — acrylic scratches and yellows) and lighting (LED strips, not spotlights, which create hot spots on the model).
IKEA Detolf is the default because it is cheap, glass on four sides, and takes LED strip lighting well. They are being discontinued, which means the secondhand market is where to look. Any glass-fronted cabinet works if it has adjustable shelves and room for a light strip.
What goes in the case: the miniatures you are proud of. Not everything you have painted — the best ones, the ones where the paint job worked. A display case with twenty mediocre models looks worse than one with five good ones. Rotate: put the current project in, take the old one out.
Lighting the room
Two kinds of light, and they serve different purposes.
Task lighting for the painting desk: a bright, cool-white (5000-6500K) LED desk lamp with a magnifier if your eyes need it. This is the light you paint under, and it needs to be bright enough to see the detail. A 10-watt LED desk lamp with adjustable arm is enough.
Ambient lighting for the room: warm white (2700-3000K) ceiling or wall lights. This is the light the room lives in when you are not painting. The contrast between the cool task light and the warm ambient light is what makes the desk feel like a workspace and the rest of the room feel like a space.
The display case needs its own light: LED strip, cool white, on the inside of the glass front or the top shelf. This is what makes the miniatures visible without opening the case.
The desk setup
The painting station needs to be organised enough that you can start painting without clearing a space first. The minimum setup:
A desk with room for a cutting mat, a paint rack, a water pot, and the miniature currently on the bench. A paint rack that holds the pots upside down (so the paint mixes when you shake). A brush holder that keeps the brushes tips-up. A lamp. A chair you can sit in for two hours.
Everything else — the files, the glue, the green stuff, the airbrush — lives in drawers or on shelves behind the desk. The desk surface is for what you are working on now, not for storage.
The paint scheme guide covers the creative side. The backdrop guide covers the photography setup, which lives on the same desk or nearby.
Putting it together
The room works when the three parts — the desk, the display, and the walls — feel like they belong to the same person. The desk is where you work. The display case is where the finished pieces live. The walls are where the best pieces are remembered at a scale the eye can read. All three are about the same thing: the models you painted, seen properly.
The cheapest upgrade is the walls, because a framed print costs less than a display case and takes less space than a shelf. And it solves the problem every miniature painter has: the thing they spent forty hours on is too small for anybody else to see.
Frequently asked
What should I put on my gaming room walls?
+
Art prints of your painted miniatures, framed at eye level. One or two large prints work better than a gallery wall of small ones. We make prints from miniature photos — upload a photo and we restyle it as a painting.
How do I display painted miniatures?
+
A glass-fronted display cabinet with LED strip lighting is the standard. IKEA Detolf is the default. Put the best models in, rotate as you paint new ones. Our display guide covers the options.
What lighting works best for a hobby room?
+
Two kinds: cool-white task lighting (5000-6500K) for the painting desk, and warm-white ambient lighting (2700-3000K) for the room. The display case needs its own LED strip inside the glass.
How do I organise a miniature painting desk?
+
The desk surface is for what you are working on now: cutting mat, paint rack, water pot, the current miniature. Everything else lives in drawers or on shelves behind the desk. A brush holder keeps the brushes tips-up.