How to draw a robot, joint by joint
How to draw a robot, in twelve steps with a drawing for each. The whole subject comes down to one idea: a robot is a set of separate parts with visible gaps between them, and the gaps are what make it mechanical.
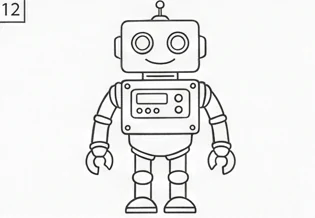
Robots are forgiving to draw because nobody can tell you the proportions are wrong. What they can tell, instantly, is whether the thing could move — and that is decided entirely by whether the joints look like joints.
How to draw a robot: the twelve steps
1. A circle and two shoulders
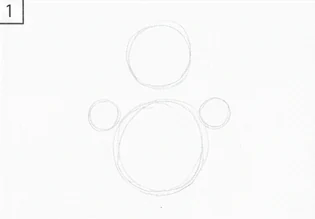
A circle for the head and two smaller ones either side of where the shoulders will be, with a larger oval between them for the chest. Leave a gap under the head — robots have necks, even short ones, and a head sitting straight on a torso reads as a toy.
2. Square the head and torso
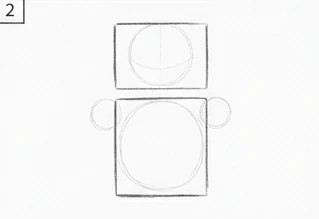
Turn the head circle into a rounded box and the chest oval into a tapered block, narrower at the waist. Straight lines and hard corners are what separate a robot from an animal, so commit to them.
3. Shoulder joints
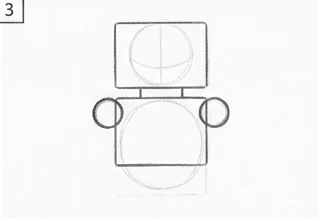
Draw the two shoulder circles properly now, sitting slightly outside the torso block rather than on top of it. A joint that overlaps the body cannot rotate, and the eye knows.
4. Arms in segments
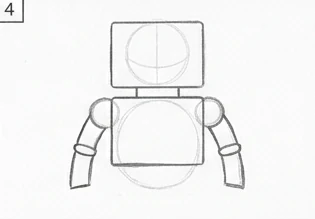
Upper arm, elbow, forearm — three shapes, not one line. Keep each segment a simple tapered box or cylinder with a visible gap at the joint. The gaps are what make the arm look mechanical.
5. Legs, the same way
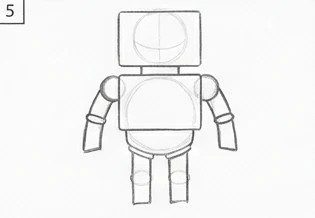
Thigh, knee, shin, drawn as segments with joints between them. Make the legs shorter and thicker than a human figure would have: a robot with long slim legs looks unstable, which undercuts the whole thing.
6. Hands and feet
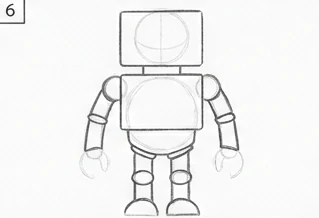
Simple blocks with two or three fingers, and feet wider than the ankles. Big feet do a lot of work here, because they tell the viewer this thing is heavy and can stand up.
7. The face panel
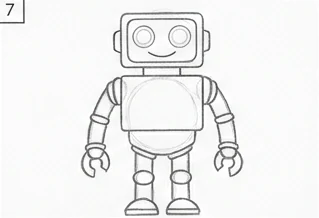
A recessed rectangle in the head with two round eyes in it. Round eyes on a square head is the friendliest combination there is; if you want a menacing robot, narrow them to slots instead.
8. Chest plate and dials
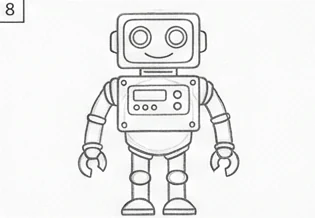
A raised panel on the chest with a couple of simple controls on it. Resist filling it — three elements read as designed, twelve read as noise.
9. The antenna
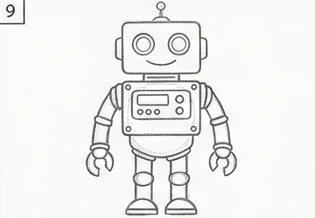
A thin stalk from the top of the head with a small ball on the end, off centre rather than dead middle. Small detail, big effect: it is the thing that makes the silhouette recognisably a robot.
10. Panel lines and rivets
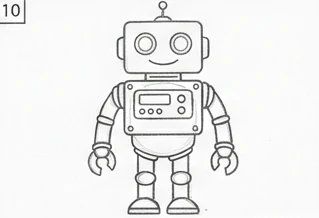
A few seams where sections meet, and rivets only at the corners of panels. These are surface marks, so keep them lighter than the outline or the robot will look scribbled on.
11. Commit the outline
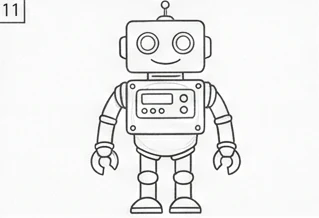
Darken the silhouette and the joint gaps first, then the panel edges. The joints deserve the heaviest line in the drawing, because they are what the whole design is about.
12. Erase and check the stance
Rub out the construction circles, then check the feet are level and the shoulders are square. A robot leaning a couple of degrees looks broken rather than casual, which is not true of a person.
Gaps, not lines
The single most useful habit for this subject is leaving a visible space where two segments meet, rather than drawing one continuous limb and putting a line across it. A line says "there is a mark here". A gap says "these are two objects".
It costs nothing and it is the difference between a robot and a person in a suit.
Heavy reads better than sleek
Short thick legs, big feet, a chest wider than the waist. A robot drawn with human proportions looks unstable, because we read metal as heavy and expect the support to match.
If you want a sleek robot, earn it later — get the heavy version working first, because it is far easier to see what is wrong with it.
Finished? Print it
Compare the available sizes and prices before ordering. Free UK delivery is included in every price.
Good to know
How do you make a robot look mechanical rather than cartoonish?
Leave visible gaps at every joint instead of drawing continuous limbs, and use straight edges and hard corners rather than curves.
What proportions should a robot have?
Shorter and thicker than a human figure, with feet wider than the ankles and a chest wider than the waist. Slim legs make a metal object look like it would fall over.
How do I draw a friendly robot rather than a menacing one?
Round eyes on a square head read as friendly. Narrow the eyes to slots and the same robot reads as a threat.
How much detail should the chest panel have?
Three elements or so. A panel with a dozen dials on it reads as noise; a few placed deliberately read as design.