How to draw a sword, starting with one line
How to draw a sword, in twelve steps with a drawing for each. Almost everything about this subject is symmetry, so the centre line in step two is not a formality — it is the thing that stops the blade bending.
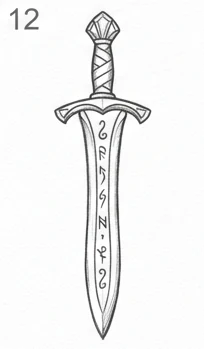
Swords look simple and are quietly difficult, because they are symmetrical and the human hand is not. A blade drawn freehand will curve very slightly, and once you notice it you cannot stop noticing it.
How to draw a sword: the twelve steps
1. Three shapes on a line
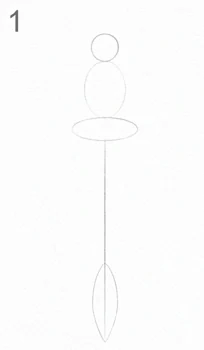
A small circle for the pommel, an oval above it for the grip, and a long narrow lens shape for the blade. Space them along a light vertical. A sword is mostly symmetry, and everything from here depends on that line.
2. The centre line
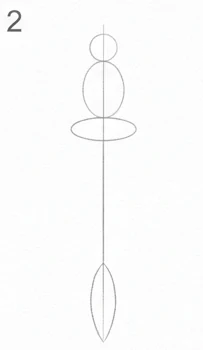
Extend the vertical through the whole drawing, from pommel to point. Every measurement from now on gets checked against it. Skipping this is why hand-drawn swords bend.
3. Blade edges
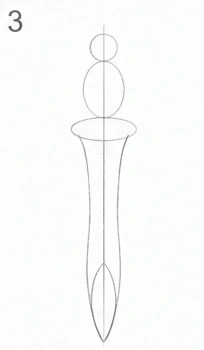
Two lines running from the guard to the tip, tapering gradually and meeting at a point. Taper less than feels right at first — a blade that narrows too fast looks like a spike rather than a sword.
4. Cut in the fuller
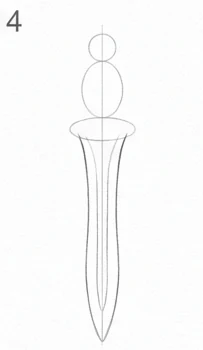
The groove down the centre of the blade, a narrow shape following the taper and stopping short of the point. It is what stops a blade looking like a flat cardboard cut-out.
5. The crossguard
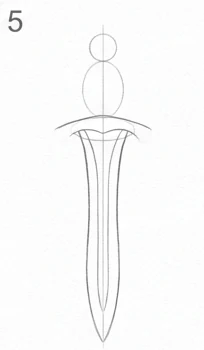
A horizontal bar at the base of the blade, curving slightly towards the tip at each end. Make it wide enough to look protective; a short guard reads as a kitchen knife.
6. Shape the guard
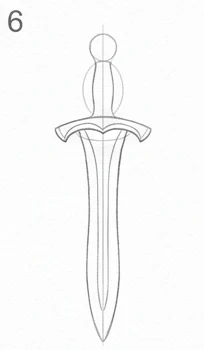
Give the bar thickness and taper each arm towards its end. Add the small collar where the guard meets the blade. This joint is where a sword either looks made or looks drawn.
7. The pommel
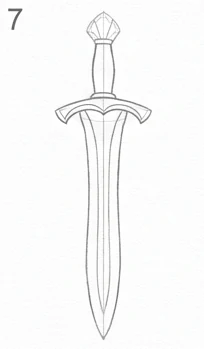
Turn the circle into a faceted shape with a visible top, sitting under the grip. A pommel is a counterweight, so it should look heavy. Flat discs look decorative; faceted lumps look functional.
8. Wrap the grip
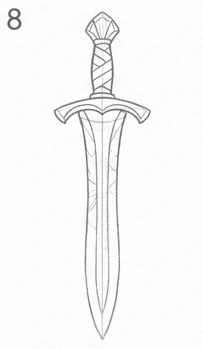
Diagonal bands running up the grip, evenly spaced and all leaning the same way, following the slight curve of the handle. The spacing matters more than the neatness.
9. Engrave the blade
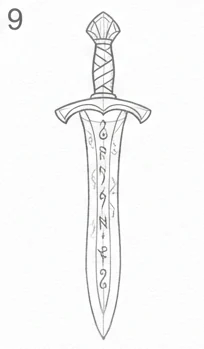
Marks running down the fuller — a simple repeating pattern of your own invention. Keep them shallow and light. This is decoration, not structure, and heavy engraving fights the shape of the blade.
10. Edge highlights
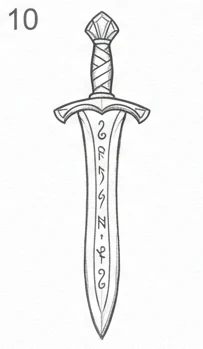
A second line just inside each blade edge for most of its length, thin and broken. It reads as the bevel catching light, and it is the difference between a flat shape and a piece of steel.
11. Darken the metal
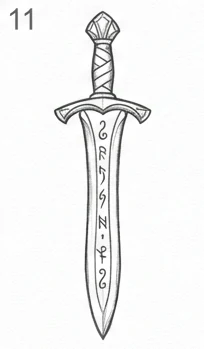
Go over the outline, the guard and the pommel. Keep the fuller and the engraving lighter, so the blade reads as one bright surface with detail sitting in it rather than on top of it.
12. Erase and check the symmetry
Rub out the centre line, then hold the drawing up to a mirror or turn it over against the light. Asymmetry that was invisible while you were drawing is obvious the moment the image is flipped.
Taper slowly
The commonest error after asymmetry is narrowing the blade too quickly, which turns it into a spike. Real blades taper gently for most of their length and then more sharply near the point.
If in doubt, draw the edges almost parallel for the first two thirds and put all the taper in the last third.
The fuller is not a decoration
The groove down the centre is structural — it removes weight without much loss of stiffness — and it is also what stops the blade reading as a flat cut-out. Keep it narrow, follow the taper, and stop it well before the point.
Leave it lighter than the outline. A fuller drawn as heavily as the edges makes the blade look like it has a stripe painted on it.
Finished? Print it
Compare the available sizes and prices before ordering. Free UK delivery is included in every price.
Good to know
How do you draw a sword straight?
Draw a centre line first and check every measurement against it. Hand-drawn blades curve slightly, and the curve is invisible until the drawing is flipped or held to a mirror.
What is the groove down a sword blade called?
The fuller. It reduces weight without much loss of stiffness, and in a drawing it is what stops the blade looking like a flat shape.
Why does my sword look like a spike?
The blade is tapering too fast. Keep the edges nearly parallel for the first two thirds and put most of the narrowing into the last third.
How do I draw the grip wrapping?
Evenly spaced diagonal bands, all leaning the same way, following the curve of the handle. Consistent spacing matters more than neat lines.